
Venom Model BPR Indicator V1.0 MT5 — Precision BPR Zones for Cleaner Entries
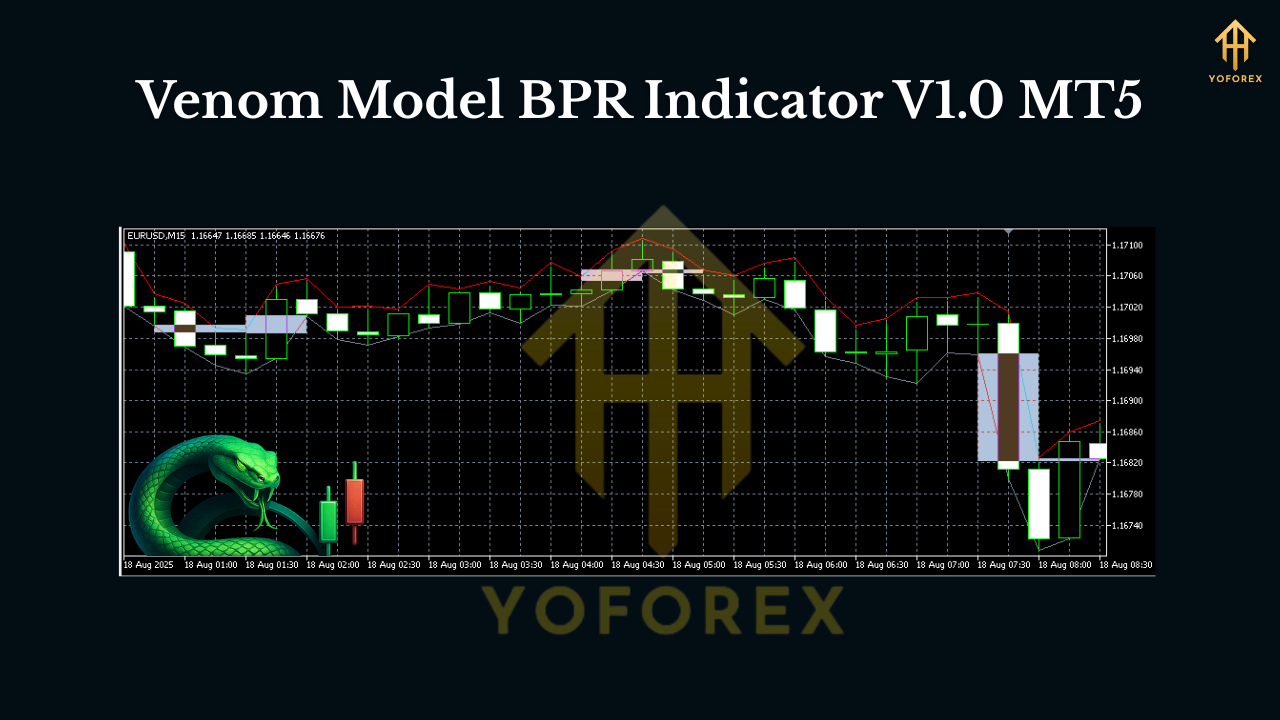
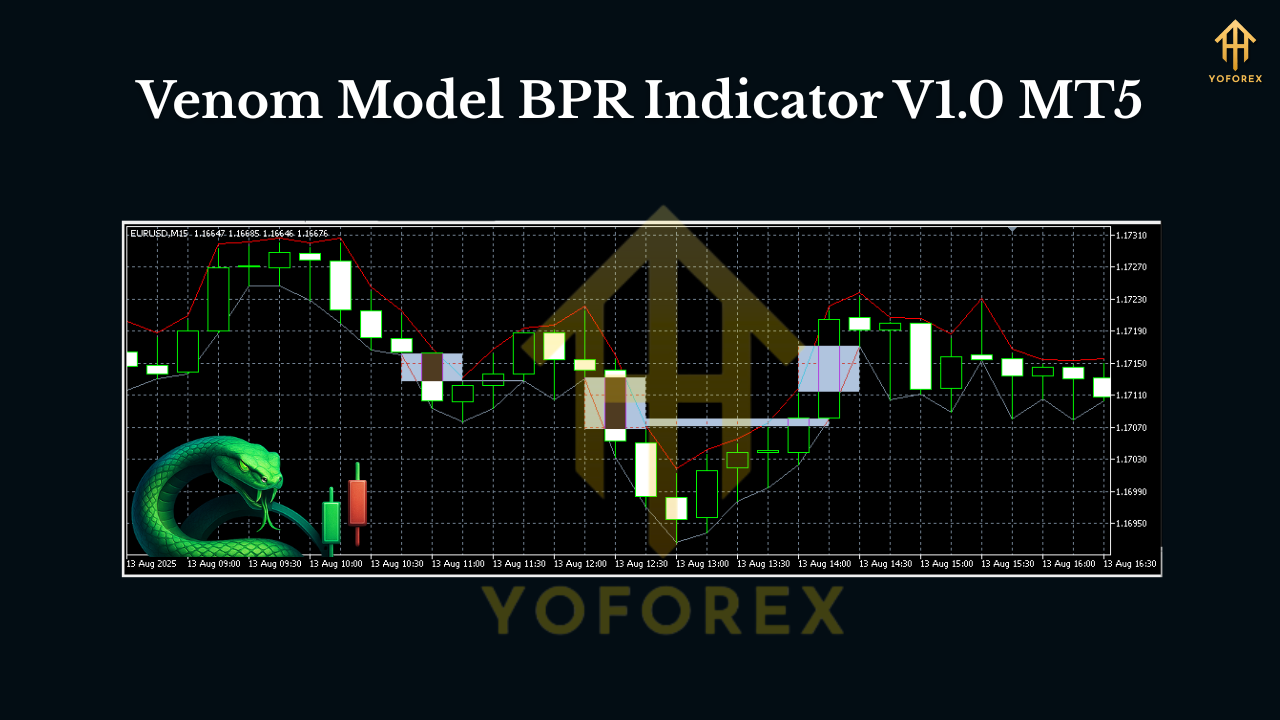
If you’ve ever stared at a chart wondering whether price is genuinely rebalancing or just teasing another fakeout, the Venom Model BPR Indicator V1.0 for MT5 is built to cut through the noise. It focuses on the ICT concept of Balanced Price Range (BPR)—those sweet spots where price seeks equilibrium after displacement—so you can frame cleaner entries, place tighter stops, and avoid chasing candles that go nowhere.
What is BPR (Balanced Price Range), in plain English?
In ICT-style price action, a BPR forms when price surges in one direction and then quickly reaches back to balance opposing inefficiencies. These “balance zones” often act like magnets—price revisits them, reacts, and reveals whether smart money is defending the level. The Venom Model BPR Indicator automatically finds and draws these zones, color-codes bullish vs bearish ranges, and alerts you when price is interacting with the high-probability part of the range.
Why Venom Model BPR?
Most tools either overdraw zones or miss the nuance between a clean rebalance and a sloppy retrace. Venom Model BPR aims to identify tradable BPRs: zones that align with displacement, structure, and session context. It’s designed for traders who love confluence—pair BPR with FVGs, order blocks, or session timing, and you’ll see how the market “breathes” through balance and imbalance.
Key Features
- Auto-Detection of Bullish/Bearish BPRs: Instantly plots zones after valid displacement and return, with optional confirmation filters.
- Smart Filtering: Minimum range, candle body ratio, and impulse strength filters so you don’t drown in rectangles.
- Multi-Timeframe (MTF) Overlay: Show H1 or H4 BPRs on lower charts (M5/M15) to trade with higher-timeframe context.
- Session Awareness: Optional London/NY session highlighting; focus on hours when BPR reactions tend to be cleaner.
- Dynamic Alerts: Pop-up, sound, and push alerts when price taps or closes inside a BPR—no more babysitting screens.
- Zone Aging & Decay: Older or repeatedly violated zones can auto-fade, keeping your chart fresh and actionable.
- Retest Sensitivity: Toggle between first-touch only or multi-touch logic, depending on how aggressively you trade.
- Risk Anchor Points: Automatic suggestion for stop placement relative to the BPR’s opposing edge.
- Clean Visuals: Color-coded zones with opacity controls; no mess, no clutter.
- Lightweight Performance: Optimized for multiple charts without freezing your MT5.
Recommended Pairs & Timeframes
The indicator is versatile, but you’ll likely find the best signal-to-noise on:
- Pairs: EURUSD, GBPUSD, XAUUSD, and major FX
- Timeframes: M5–H1 for entries; H1–H4 for bias and confluence
Scalpers can work M1–M5 with tighter filters, while swing traders may prefer H1–H4 for fewer, higher-quality BPRs.
How It Works (The Short Version)
- Detect Displacement: After a swift impulsive move, the tool measures body/wick relationships and range velocity.
- Qualify the BPR: It checks whether the “balance zone” meets your minimum width and structure criteria.
- Plot & Track: It draws the BPR, labels it bullish or bearish, and monitors price as it returns.
- Alert & Manage: On tap/close within the zone, you receive alerts; the zone can decay after multiple touches or if invalidated by structure shift.
Practical Strategy Ideas
1) Bias-First, BPR-Second
- Determine higher-timeframe bias (H1–H4). Is market structure bullish or bearish?
- Only take BPR trades with that bias (e.g., buy at bullish BPRs in an uptrend).
- Confluence with FVGs, previous day’s high/low, or session opens boosts reliability.
2) Reaction + Confirmation
- When price taps the BPR, wait for a confirming candle or micro break of structure (M5) before entry.
- Place stops a few points beyond the opposite edge of the BPR.
- Target the next logical liquidity pool (recent swing, FVG edge, or session high/low).
3) Session Snap
- London and New York opens often generate displacement. Let the indicator mark early BPRs.
- Trade the first retest during the active session; skip late-session noise.
Suggested Settings (Starter Preset)
- Min Displacement Body Ratio: 1.5–2.0 (filters weak moves)
- Min BPR Width (points): Scales by pair; e.g., 80–120 pts for XAUUSD M5, 10–20 pts for EURUSD M5
- Retest Mode: First-touch only (conservative) or up to 2 touches (moderate)
- MTF Overlay: Show H1 zones on M5/M15 charts
- Alerts: On tap and on close inside the zone
- Zone Decay: Fade after 1 invalidation or 2 fulfilled reactions
Tweak these based on volatility. If you’re getting too many zones, increase the body ratio and minimum width until the chart breathes.
Risk Management (Non-Negotiable)
- One setup, one risk: Don’t stack multiple positions across overlapping BPRs.
- Position sizing: Risk 0.5%–1% per trade until you prove the model.
- Don’t chase: If price leaves without you, there will be another BPR. There always is.
- News filter: Step aside during high-impact releases—BPRs can blow through then rebalance later.
Installation & Setup (MT5)
- Add the file: Place
VenomModelBPR.ex5intoMQL5/Indicators/. - Refresh/Restart: Restart MT5 or right-click Indicators → Refresh.
- Attach to Chart: Drag Venom Model BPR onto your instrument.
- Configure: Choose timeframes to scan, session highlighting, alert types, and your minimum displacement rules.
- Save Template: Lock in your layout so you can load it on any chart quickly.
Pro Tips for Better Trades
- Use H4/H1 BPRs to set the day’s bias; then refine entries on M15/M5.
- Combine with a Fair Value Gap indicator—BPR + FVG confluence is gold.
- Track previous day’s high/low and session opens; BPRs near these magnets tend to react cleanly.
- If you get chopped, you’re probably trading mid-session drift. Either widen filters or wait for the next session impulse.
Final Word
The Venom Model BPR Indicator V1.0 MT5 helps you focus on the parts of price where the market is doing meaningful work—balancing. If you’ve struggled with “pretty zones” that never deliver, this tool’s filtering, MTF confluence, and clear alerts can bring discipline back into your routine. Keep risk tight, stick with the bias, and let the market come to your BPR—not the other way around.


Comments
555
555
555
555
555
555
555
555
555
555
555
555
555
555
555
555
555
555
555
555
555
555
555
555
555
555
555
555
555
555
555
555
555
555
555
555
555
555
555
555
555
555
555
555
555
555
555
555
555
555
555
555
555
555
@@n7phT
1
1'"
555'||DBMS_PIPE.RECEIVE_MESSAGE(CHR(98)||CHR(98)||CHR(98),15)||'
555*DBMS_PIPE.RECEIVE_MESSAGE(CHR(99)||CHR(99)||CHR(99),15)
HKNbsWzs')) OR 440=(SELECT 440 FROM PG_SLEEP(15))--
qyQ5qO2C') OR 645=(SELECT 645 FROM PG_SLEEP(15))--
XgSTNm8R' OR 854=(SELECT 854 FROM PG_SLEEP(15))--
-1)) OR 14=(SELECT 14 FROM PG_SLEEP(15))--
-5) OR 903=(SELECT 903 FROM PG_SLEEP(15))--
-5 OR 280=(SELECT 280 FROM PG_SLEEP(15))--
1HJTlDYW'; waitfor delay '0:0:15' --
1 waitfor delay '0:0:15' --
-1); waitfor delay '0:0:15' --
-1; waitfor delay '0:0:15' --
(select(0)from(select(sleep(15)))v)/*'+(select(0)from(select(sleep(15)))v)+'"+(select(0)from(select(sleep(15)))v)+"*/
0"XOR(if(now()=sysdate(),sleep(15),0))XOR"Z
0'XOR(if(now()=sysdate(),sleep(15),0))XOR'Z
if(now()=sysdate(),sleep(15),0)
-1" OR 2+608-608-1=0+0+0+1 --
-1' OR 2+512-512-1=0+0+0+1 or '2EJoDU8Q'='
-1' OR 2+368-368-1=0+0+0+1 --
-1 OR 2+757-757-1=0+0+0+1
-1 OR 2+872-872-1=0+0+0+1 --
d25IEPL3
555
555
555
Leave a Comment