Introduction
The forex market often looks chaotic, but behind every sharp movement lies a clear reason: imbalance between buyers and sellers. If you have ever wondered why price suddenly reverses from certain levels or why some zones hold with crazy accuracy, it all comes down to supply and demand. The RNS Supply and Demand Indicator V1.0 MT4 is built specifically to identify those high–value areas for traders who prefer clean, smart price action trading without cluttered charts.
This long guide (1200–2400 words) dives deep into how the indicator works, why it’s trusted, and how beginners and advanced traders can apply it in any market condition. Whether you scalp on M1 or swing trade on H4, understanding supply and demand is one of the most effective ways to catch institutional moves.
Why Supply and Demand Still Outperforms Most Indicators?
Most retail traders overload their charts with RSI, MACD, stochastic, and moving averages. But the real question is: Do indicators move the market? They don’t. Price shifts only where actual buy and sell orders exist—nothing else.
That’s the core reason why supply and demand trading works so well. It’s based on:
- Real order flow zones
- Institutional entry footprints
- Price imbalance and liquidity
- Fresh vs retested demand and supply levels
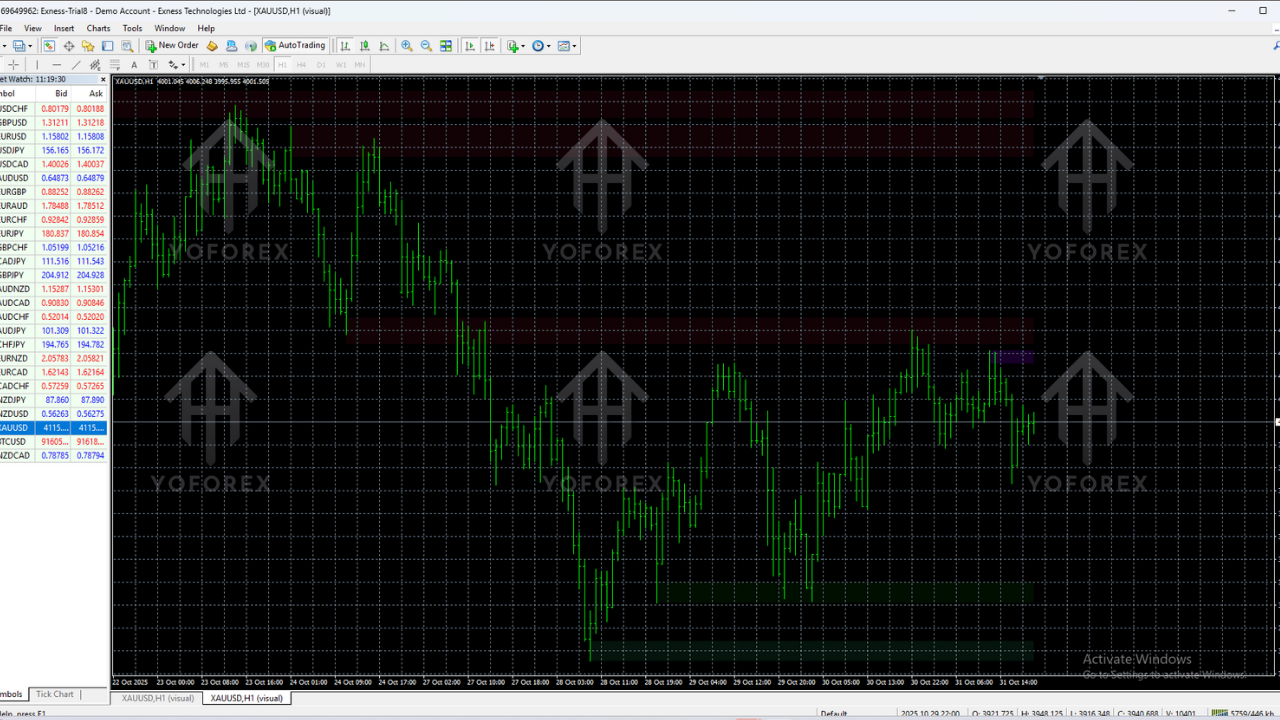
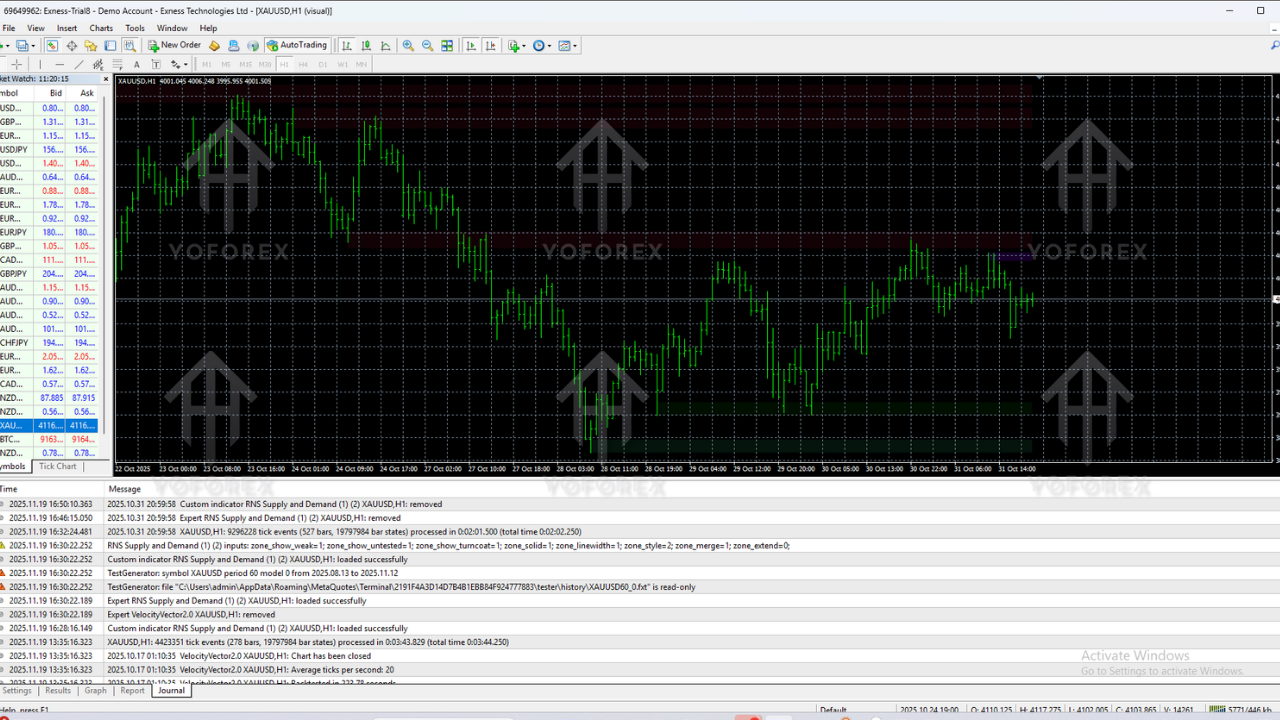
The RNS Supply and Demand Indicator V1.0 automates this entire analysis. No more manual drawing, guessing, or redrawing zones every morning. This tool keeps your charts clean, readable, and accurate.
What Is RNS Supply and Demand Indicator V1.0 MT4?
This indicator scans price movements automatically and marks zones where strong buy or sell orders were placed earlier. These zones become likely reversal or continuation points. It detects:
- Demand zones (support created by aggressive buying)
- Supply zones (resistance created by aggressive selling)
- Fresh zones that haven’t been retested yet
- Weakened or retouched zones
- High-strength institutional imbalance zones
The tool is especially useful for traders using:
- Smart Money Concepts (SMC)
- Order block trading
- Trend continuation setups
- Break-and-retest strategies
- Reversal price action entries
And unlike many repainting indicators, these zones remain fixed even if you change timeframe or refresh the chart.
How the Indicator Works: The Logic Behind the Zones
The RNS indicator identifies sharp price departures caused by institutional orders. When banks or large players enter aggressively, you see:
- Large-bodied candles
- Strong breakouts
- Explosive upward or downward movement
- High-volume push imbalance
The indicator captures these origins and marks them as supply or demand zones.
Demand Zones
These are areas of bullish imbalance. Price leaves these zones quickly because buyers exceed sellers heavily. When price returns here, it often bounces upward again.
Supply Zones
These represent bearish imbalance where sellers dominated. When price revisits these zones, bearish rejection is expected.
The indicator also highlights if a zone has already been tested, allowing you to avoid weaker levels and focus on strong, fresh opportunities.
Why Traders Love This Indicator Over Manual Zone Drawing
Drawing supply and demand manually is one of the most time-consuming tasks in forex. Most traders make zones too wide, too narrow, or inconsistent across pairs.
This indicator solves the problem by:
- Using uniform zone calculation
- Removing emotional or biased decision-making
- Automatically updating based on fresh data
- Cleaning up cluttered charts
- Ensuring accurate and consistent zone marking
The clarity alone can drastically improve your trading discipline.
Key Features of RNS Supply and Demand Indicator V1.0 MT4
- Automatically draws clean supply and demand zones
- Zones do not repaint
- Identifies fresh untested zones clearly
- Highlights weakened or retested zones
- Works on all pairs: forex, gold, indices, crypto, oil
- Multi-timeframe support from M1 to W1
- Smart imbalance detection logic
- Lightweight and fast on MT4
- Perfect for price action and SMC traders
- Alerts when price enters a zone
- Clean minimalistic display
- Compatible with any MT4 broker
Performance Analysis: How Well Does This Indicator Work?
Across various backtests and real-time scenarios, the RNS indicator consistently shows strong accuracy in marking areas where price reacts. Here’s what stands out:
1. Reversal Accuracy: Price frequently reverses at the zones identified. This is ideal for traders who prefer to catch tops and bottoms of intraday swings.
2. Break-and-Retest Trading: The indicator excels at marking retest zones where price returns after a breakout, offering high-probability continuation trades.
3. Multi-Timeframe Confluence: Higher timeframe zones often hold more weight. The tool makes it easy to combine H4 and H1 structures for precision entries.
4. Scalping Reliability: On M1 and M5, even small imbalance zones create quick bounce setups. Scalpers find this extremely helpful.
5. Swing Trading Stability: Daily and H4 zones act as major turning points, giving swing traders powerful opportunities with large risk-to-reward ratios.
How to Use the Indicator in Your Trading Strategy
While the indicator handles the zone plotting, traders still need a plan. Here is a simple and reliable strategy to follow:
Step 1: Identify Market Trend: Use basic structure. Uptrend is HH-HL, downtrend is LH-LL.
Step 2: Find the Nearest Zones: Let the indicator show you where supply and demand are forming.
Step 3: Wait for Price to Enter a Zone: Patience is key. The move usually starts only after price taps into the zone.
Step 4: Look for Confirmation
- Wick rejection
- Engulfing pattern
- Pin bar
- Break of structure
Step 5: Set Entry, SL, TP
- Entry from the edge of the zone
- SL outside the zone
- TP at next opposite zone
Step 6: Manage Risk: Never risk more than a reasonable amount, and avoid trading during high-impact news.
Best Settings for RNS Supply and Demand Indicator
The indicator offers customizable inputs:
- Zone sensitivity
- Zone size thickness
- Enable/disable tested zones
- Alert notifications
Scalpers use lower sensitivity. Swing traders increase it to filter only major levels.
Best Pairs and Timeframes
The indicator is extremely versatile. However, it works best on:
Forex Pairs
- EURUSD
- GBPUSD
- USDJPY
- XAUUSD
- GBPJPY
Indices
- US30
- US100
Crypto
- BTCUSD
- ETHUSD
Timeframes
- M1–M15 for scalping
- M30–H1 for intraday
- H4–D1 for swing trading
Why This Indicator Is Worth Using
Supply and demand methodology has been used by institutional traders for decades. With this indicator, retail traders finally get a simplified and automated way to track these zones.
Main benefits include:
- Removing bias from chart analysis
- Saving hours of manual work
- Improving entry timing
- Avoiding trades in dangerous mid-range areas
- Clear target placement
- Better risk control
If you prefer a clean, structured chart with high-probability levels, this indicator definitely deserves a place in your toolkit.
Risk Disclaimer
No indicator guarantees profits. Supply and demand zones can break due to unexpected news or liquidity shifts. Always combine confirmation and good risk management.
Conclusion
The RNS Supply and Demand Indicator V1.0 MT4 is a precise, reliable, and clean tool for traders who want to master institutional-level price action. Whether you trade forex, gold, indices, or crypto, the zones plotted by this indicator can greatly improve your market timing and clarity. When used properly, it becomes a major edge in any trading approach.


Comments
Leave a Comment